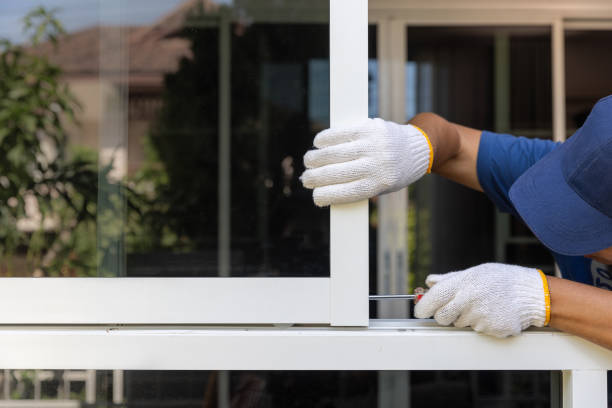
Replacing windows in your home can seem like a complex task, but breaking it into manageable steps ensures a smoother process. Here’s a step-by-step guide to help you navigate the complete window replacement journey, from preparation to completion.
1. Assess Your Current Windows and Needs
Before beginning any window replacement project, it’s essential to evaluate your current situation. Ask yourself: – Are your current windows damaged, outdated, or inefficient? – Are you looking for better energy efficiency or updated aesthetics? – What type of windows do you want to install (double-hung, casement, sliding, etc.)?
This initial assessment will help you determine whether full-frame replacement or pocket installation is appropriate for your project.
2. Gather Necessary Tools and Materials
Having the right tools and materials ready before starting can save time and reduce stress. Common items needed include: – Measuring tape – Level – Pry bar – Utility knife – Caulk and caulking gun – Insulation foam – Safety glasses and gloves
Additionally, ensure the new windows are delivered on time and match your specifications.
3. Take Accurate Measurements
Accurate measurements are crucial for ensuring the new windows fit correctly. Measure the height and width of the window opening at multiple points (top, middle, bottom). Note any discrepancies as older homes may have uneven openings.
| Measurement Type | Measurement 1 | Measurement 2 | Measurement 3 | Final Size |
|---|---|---|---|---|
| Width | xx inches | xx inches | xx inches | Smallest |
| Height | xx inches | xx inches | xx inches | Smallest |
Always use the smallest measurement when ordering new windows to account for variations.
4. Remove Old Windows Safely
Removing existing windows requires careful attention to avoid damaging surrounding structures or materials: 1. Use a utility knife to cut through any caulk or paint sealing the old window in place. 2. Remove interior stops and sashes with a pry bar. 3. Unscrew or release any fasteners holding the window frame. 4. Gently pull out the old frame while wearing safety gear.
Inspect for any damage around the opening that may need repair before proceeding.
5. Install New Windows
Installing replacement windows involves several steps: 1. Dry-fit: Place the new window into the opening to ensure proper fit. 2. Apply Caulk: Run a bead of exterior-grade caulk around the perimeter of the opening where contact will be made. 3. Secure Frame: Insert the window into place and use shims as needed to level it properly before securing it with screws. 4. Test Operation: Open and close the window multiple times to confirm smooth operation.
Take care not to over-tighten screws as this could warp your new frame.
6. Insulate And Seal Gaps
To maximize energy efficiency: – Use low-expansion spray foam insulation between gaps in frames. – Trim excess foam after it cures.
Finish by applying an additional layer of caulk around exterior edges where frames meet siding for weatherproofing purposes.
7. Add Interior Finishing Touches
Reinstall interior stops or trim removed during step four or replace them if needed with updated molding styles matching room decor preferences.
By following each outlined phase carefully above ensures longevity while boosting comfort/security within household spaces without unnecessary surprises/errors occurring during installation efforts
Expert Window Installation Rockville, MD: Accurate Measurements Matter
Accurate measurements are the cornerstone of any successful window replacement project. Incorrect dimensions can lead to ill-fitting windows, inefficient sealing, and even structural damage. Taking precise measurements ensures that your new windows not only look great but also perform effectively in terms of insulation, security, and energy efficiency.
Tools You’ll Need
To begin measuring your windows accurately, gather the following tools: – Measuring tape: A sturdy, retractable tape measure with clear markings. – Level: Ensures the window frames are straight and aligned properly. – Notebook or digital device: To record all measurements for future reference. – Pencil or marker: For marking areas if necessary.
How to Measure for Window Replacement
- Take three horizontal measurements inside the existing window frame:
a) At the top
b) In the middle
c) At the bottom -
Use the smallest measurement as your final width dimension to account for any irregularities in the frame.
- Similarly, take three vertical measurements from inside of the frame:
a) Left side
b) Center
c) Right side -
Again, use the smallest value as your height dimension.
- Measure from inside edge to outside edge of the frame; this ensures that any replacement window fits comfortably within your wall’s depth.
Common Measurement Mistakes to Avoid
To ensure accuracy, avoid these common errors: – Measuring windows from outside instead of inside. – Neglecting to subtract space for frame material when needed. – Using a worn-out or inaccurate tape measure. – Failing to record all measurements clearly and consistently.
Measurement Tips for Specialty Windows
If you’re replacing specialty windows like bay or arched designs, additional steps may be required: – Break down curved sections into segments and measure each individually. – Consult with a professional if measuring unusually shaped frames seems challenging.
| Measurement Aspect | Key Considerations |
|---|---|
| Width | Always use interior dimensions; record smallest value |
| Height | Include sill angles if necessary |
| Frame Depth | Double-check compatibility with walls or trim |
Accurate measurement is an essential first step that impacts everything else in your project—from ordering materials to ensuring proper installation. Taking time here saves time and money later while guaranteeing long-term performance.
Accurate Measurements: The Key to Successful Replacement Windows Rockville, MD
Accurate measurements are the foundation of any successful window replacement project. Without precise dimensions, even the highest-quality windows may fail to fit properly, leading to issues such as drafts, energy inefficiency, water leakage, and compromised aesthetics. Below is a detailed guide on how to take accurate measurements for window replacement.
Essential Tools for Window Repair in Rockville, MD
- Measuring tape (preferably a steel one for accuracy)
- Notebook or digital device for recording measurements
- Level (optional but helpful)
- Step ladder (if needed for higher windows)
Having the right tools ensures precise results and minimizes errors.
How to Measure for Window Glass Replacement Rockville, MD
- Take three horizontal measurements (top, middle, and bottom) of the window frame from jamb to jamb.
-
Record the smallest measurement. Use this as your final width dimension.
- Measure vertically from the sill (bottom of the frame) to the top of the opening at three points: left side, center, and right side.
-
Again, record the smallest measurement as this will ensure a proper fit.
- If you’re replacing with a retrofit or new-construction window model, measure the depth of your existing frame or wall recess.
-
Standard measurement requirements vary, so consult manufacturer guidelines if needed.
- Check whether your window opening is square by measuring diagonally from corner to corner in an “X” pattern.
-
If there’s more than 1/4-inch difference between diagonal measurements, adjust your plans or consult a professional installer.
- Identify any potential obstructions such as molding or trim that might affect installation.
- Factor in these details when planning your purchase and installation process.
Common Measurement Challenges
| Challenge | Solution |
|---|---|
| Out-of-square frames | Consider custom-sized windows or adjustments during installation |
| Hard-to-access areas | Use an extendable ladder or hire a professional for hard-to-reach spaces |
| Old building structures | Account for irregularities common in older homes |
Why Precision Matters
- Higher installation costs due to resizing
- Delays caused by reordering incorrect sizes
- Reduced energy efficiency from gaps or improper sealing
- Compromised structural integrity of surrounding walls
Taking precise dimensions saves time and money while delivering optimal results in terms of aesthetics and functionality.
When to Seek Professional Help
If you’re unsure about taking accurate measurements yourself—especially for custom windows or uniquely shaped openings—it’s wise to consult with a professional contractor or installer. Many companies offer measurement services as part of their package.
Accurate measurements are truly integral for achieving dependable performance from your replacement windows while maintaining comfort and style in your home environment.
Choosing and Ordering the Right Windows for Your Home
Selecting and ordering the perfect windows for your home is a critical step in ensuring both functionality and aesthetics. The process involves balancing personal preferences, energy efficiency, durability, and budget. Here’s a detailed guide to help you make the best decision.
Factors to Consider When Choosing Windows
- Style of Windows: Different window styles serve different purposes. Common options include:
- Double-Hung: Versatile and easy to clean with two operable sashes.
- Casement: Hinged on one side, opening outward for better ventilation.
- Sliding: Horizontal movement, ideal for wide spaces.
-
Picture Windows: Fixed glass panels that provide unobstructed views.
- Vinyl: Affordable, low-maintenance, and energy-efficient.
- Wood: Highly customizable but requires regular upkeep.
- Fiberglass: Durable with excellent thermal performance but often pricier.
-
Aluminum: Lightweight and strong but less insulated than other materials.
- Choose between single-pane, double-pane, or triple-pane depending on insulation needs.
-
Consider Low-E (low emissivity) coatings for better energy efficiency by reflecting heat.
-
Energy Performance Ratings: Look at labels such as U-Factor (measures heat loss) and Solar Heat Gain Coefficient (SHGC). Lower values are ideal for colder climates.
Understanding Your Budget
Windows are available at varying price points. To stay within budget while ensuring quality: – Set a realistic spending range based on the size of your project. – Account for additional costs like delivery charges or customizations. – Prioritize features that are non-negotiable, such as insulation or material quality.
| Window Material | Average Cost per Unit (Installed) |
|---|---|
| Vinyl | $300–$700 |
| Wood | $800–$1,200 |
| Fiberglass | $600–$1,500 |
| Aluminum | $400–$900 |
Steps to Order the Right Windows
-
Measure Accurately: Take precise measurements of window openings (height, width) using a measuring tape. Always record dimensions in inches.
-
Research Trusted Manufacturers or Brands: Review customer feedback and warranty policies before committing to a brand.
-
Consult Professionals for Customizations: If you need specialized designs like arched frames or stained glass options, work with experts who can accommodate these requirements.
-
Place Your Order Early: Many custom windows have lead times ranging from weeks to months due to manufacturing schedules. Plan ahead so installation timelines aren’t delayed.
-
Verify Details Upon Delivery: Check that all items match your specifications before installation begins—this includes frame material color and dimensions.
Tips for Eco-Friendly Choices
- Opt for ENERGY STAR-certified products designed to meet energy-saving standards tailored by region.
- Choose materials from recyclable sources where possible (e.g., wood from sustainably managed forests).
- Install tinted or double-glazed panes in sun-exposed areas to reduce cooling costs during warmer months.
By selecting the right windows tailored specifically to your home’s design and functional needs—and ordering them through trusted suppliers—you’ll ensure a smooth installation process that adds value both immediately and in years ahead.
Tips for Preparing Your Home in Rockville, MD for Seamless Windows Installation
Proper preparation of your home and work area is essential to ensure that your window installation project goes smoothly, safely, and efficiently. Taking the time to prepare can also help protect your belongings and reduce post-installation cleanup. Below is a detailed guide on how to prepare for a seamless window installation.
Clear the Installation Area
Before the installation begins, make sure that all areas around the windows are free of obstructions. This allows the installers to have safe and easy access to the work area. Here are some tips:
– Remove Furniture: Move large furniture pieces like couches or tables away from windows.
– Take Down Window Treatments: Remove blinds, curtains, rods, or any other decorative elements hanging around the window frame.
– Clear Outdoor Areas: If external access is required, remove outdoor furniture, planters, or debris near windows.
Protect Your Belongings
Window installation can generate dust and debris. Protecting your possessions ensures they remain clean and undamaged during the process: – Cover furniture with drop cloths or plastic sheets. – Remove fragile items such as picture frames, vases, or electronics that could be affected by vibrations during installation. – Roll up rugs in rooms where work is taking place to avoid damage from debris.
Ensure Safety Measures Are in Place
Preparation also involves creating a safe environment for both installers and household members: – Keep pets away from construction areas by confining them in another room. – Discuss safety protocols with family members so they know which areas to avoid during installation.
Provide Access for Installers
For an efficient workflow, ensure that installers have everything they need before starting: 1. Unlock all windows being replaced so they can be easily removed.
2. Provide clear pathways indoors and outdoors if installers need access to different parts of your property (e.g., driveways or gates).
Table: Checklist for Preparing Windows
| Task | Status |
|---|---|
| Remove window coverings | ✅ |
| Move nearby furniture | ✅ |
| Cover exposed surfaces | Pending |
| Secure pets | ✅ |
Plan for Noise and Disruption
Window installation can be noisy due to tools like hammers or drills. Prepare yourself and others in your household by considering these steps: – Plan activities outside of the home if prolonged noise will be disruptive. – Let neighbors know about potential noise disturbances ahead of time.
Organize Tools & Materials (If DIY)
If you’re tackling window replacement as a DIY project, organize tools such as pry bars, caulk guns, measuring tape, and safety gear beforehand. Place materials like new windows close to their corresponding openings for easier handling during installation.
By following these steps when preparing your home and workspace, you can create an environment that facilitates a smooth window replacement process while reducing stress for everyone involved.
Sealing, Insulation, and Final Touches for a Perfect Window Installation
Ensuring your window installation is complete and durable goes beyond simply placing the window into the frame. The final steps—sealing, insulation, and finishing—are crucial for long-term functionality, energy efficiency, and aesthetic appeal. Here’s a detailed breakdown of how to approach these critical steps for optimal results.
Importance of Proper Sealing
- Choose the Right Sealant: Opt for high-quality caulk or sealant designed specifically for your window frame’s material (e.g., vinyl, wood, aluminum). Silicone-based sealants often work best as they are flexible and long-lasting.
- Apply Evenly: Use a caulking gun to apply an even bead of sealant along the edges where the window meets the frame and wall. Smooth it out with a gloved finger or caulk-smoothing tool for a clean finish.
- Focus on Vulnerable Areas: Pay special attention to corners and gaps where leaks are most likely to occur.
Insulating Around Windows
Proper insulation improves energy efficiency by reducing heat transfer through gaps around the window. This step is particularly important in colder climates where heat loss can be significant during winter months.
- Once the window is installed but before sealing, inspect any gaps between the frame and wall.
-
Larger gaps may require additional support materials before insulation.
- Low-expanding spray foam is ideal for filling small gaps without overloading or warping the frame.
-
Apply carefully around the edges of the window to ensure consistent coverage.
- Over-expansion might exert pressure on your window frame or glass panes.
-
Wipe away excess foam before it hardens using a damp cloth.
- If you’re installing new insulation materials behind trim work or near windowsills, ensure they meet recommended R-value ratings for climate control efficiency.
Finishing Touches to Enhance Appearance
- Reattach interior molding or casing carefully.
-
Ensure miters (angled cuts) align perfectly at corners for a polished look.
-
If wooden frames were installed or modified during installation, sand rough edges lightly before applying paint or stain that matches existing décor.
- Remove labels from glass panes.
- Wash all surfaces with a non-abrasive cleaner to remove dust and smudges left during installation.
Table: Comparing Common Sealants
| Type of Sealant | Key Features | Best Used For |
|---|---|---|
| Silicone-Based | Flexible, waterproof, long-lasting | High-moisture areas |
| Acrylic Latex | Paintable; less flexible | Interior applications |
| Polyurethane | Strong adhesion; durable | Exterior sealing in extreme weather conditions |
By prioritizing sealing, insulation, and proper finishing touches during your window installation process, you can maximize energy efficiency while ensuring durability over time.
More Window Replacement and Installation Guides
- Understanding the Signs and Benefits of Window Replacement in Rockville, MD
- Window Installation Rockville, MD: Everything You Need to Know for a Perfect Fit
- Before and After Checklist for a Successful Windows Rockville, MD Installation
- Essential Guide to Window Installation Rockville, MD: What Homeowners Need to Know
- Finding the Best Window Replacement Rockville, MD: Types and Tips for Your Home
- Signs You Need Replacement Windows Rockville, MD