Essential Guide to Window Installation Rockville, MD: What Homeowners Need to Know

istockphoto-1305805131-612×612

Replacing windows in your home is a significant investment. Whether you’re upgrading for energy efficiency, enhancing curb appeal, or addressing structural concerns, understanding the key aspects of window replacement ensures a smooth experience. Below, you’ll find the essential information every homeowner should know before diving into the process.

Why You Might Consider Replacing Your Windows

  • Energy Efficiency: Old windows with poor insulation can lead to higher energy bills. Newer models are designed with advanced technology like double or triple glazing and low-emissivity (Low-E) coatings to reduce heat transfer and improve energy savings.
  • Improved Aesthetics: Updating windows can transform your home’s exterior appearance and add value to your property.
  • Reduced Noise Pollution: Modern window designs often include soundproofing features that help create a quieter indoor environment.
  • Addressing Wear and Tear: Older windows may develop issues such as rotting frames, broken seals, or condensation between panes over time.
  • Enhanced Security: Upgraded locks, impact-resistant glass, and other modern features provide better protection for your home.

Types of Replacement Windows

Window Type Description Best Suited For
Double-Hung Features two sashes that slide vertically for ventilation Traditional-style homes
Casement Hinged on one side and opens outward like a door Areas requiring maximum airflow
Sliding Operates by sliding horizontally along a track Contemporary spaces with wide openings
Bay/Bow Projects outward from the wall, creating additional interior space Living rooms or areas needing natural light
Picture Window Large fixed-pane window that doesn’t open Rooms with scenic outdoor views

Factors to Consider When Choosing Windows

  1. Frame Material: Options like vinyl, wood, aluminum, and fiberglass each come with unique benefits:
  2. Vinyl is affordable and low-maintenance.
  3. Wood provides a classic look but requires regular upkeep.
  4. Fiberglass offers durability and energy efficiency.

  5. Glass Type: Look for double-pane or triple-pane options with Low-E coatings to maximize insulation.

  6. Energy Ratings: Check the National Fenestration Rating Council (NFRC) label for metrics such as U-factor (thermal performance) or Solar Heat Gain Coefficient (SHGC).

  7. Cost vs Long-Term Value: While upfront costs might seem high initially, energy-efficient windows often reduce heating/cooling expenses over time.

  8. Local Climate: Different climates demand different solutions; for instance:

  9. In cold regions, prioritize insulated glass.
  10. For hot climates, opt for Low-SHGC designs that block UV rays.

  11. Compatibility With Architectural Style: Choose designs that complement your home’s existing style rather than clash with it.

Common Misconceptions About Window Replacement

  • Myth 1: All replacement projects require complete frame removal — Reality: Insert-style replacements allow you to keep the existing frame intact if it’s in good condition.
  • Myth 2: It’s only worth replacing all windows at once — Reality: While replacing multiple units is efficient cost-wise long-term; addressing specific problem areas initially works too.

By planning ahead thoughtfully & consulting reputable professionals where necessary homeowners optimize renovation outcomes longer-lasting benefits

Key Factors That Influence the Timeline for Window Repair Rockville, MD for Installing Replacement Windows in Rockville, MD

The timeline for installing replacement windows can vary depending on several factors. On average, a standard window replacement project takes about 1–2 days for a single room or area, while larger-scale projects involving multiple windows or custom designs may take several days to complete. To better understand the timeline, let’s break down the process and key factors that influence it.

Time Estimates for Installing Replacement Windows Rockville, MD

Task Estimated Time
Initial measurements and inspection 1–2 hours
Removal of old windows 20–40 minutes per unit
Installation of new windows 30–60 minutes per unit
Sealing and weatherproofing 15–30 minutes per unit
Cleanup and finishing touches 1–3 hours (for all)

For homes with standard-sized windows, professional installers can usually replace about 8–10 units in a day. However, custom-sized windows or challenging installations may extend this timeline.

Factors That Affect the Timeline

  1. Larger projects with multiple windows require more time to complete than a single-window replacement.

  2. Custom or specialty windows (e.g., bay, bow, or oversized units) often take longer to install due to additional complexity.
  3. Standard double-hung or casement windows are usually quicker to install.

  4. If the existing window frames are damaged, rotted, or require repairs before installation, this will add time to the project.
  5. In some cases, total frame replacement may be necessary.

  6. Windows located in hard-to-reach areas (e.g., upper floors) or those requiring scaffolding will extend installation times.
  7. Homes with narrow spaces around window openings can also present challenges.

  8. Weather plays a critical role in window installation timelines. Rain, snow, or extreme temperatures can delay work since proper sealing requires dry conditions.

  9. Skilled professionals with extensive experience tend to work more efficiently than less experienced teams.
  10. DIY projects generally take significantly longer compared to hiring professional contractors.

  11. In some cases, local building codes may require permits or inspections before completing a window replacement project. This could add extra time depending on your location’s regulations.

How to Avoid Delays with Window Glass Replacement Rockville, MD

  • Work with experienced contractors who specialize in window replacements.
  • Communicate clearly with your installer about your home’s specific needs.
  • Address structural issues (e.g., rotting frames) before scheduling your installation date.
  • Schedule installations during seasons with favorable weather conditions when possible.
  • Prepare your home ahead of time: clear furniture away from windows and remove any blinds or curtains prior to arrival.

By considering these factors upfront and coordinating closely with professionals, you can help streamline the process and enjoy beautiful new windows in a timely manner without unnecessary delays.

Key Benefits and Advantages of Upgrading Your Home with Modern Windows

1. Improved Energy Efficiency

Modern windows are designed with advanced technology to reduce energy costs by enhancing insulation. Features such as double or triple glazing, low-emissivity (Low-E) coatings, and gas-filled panes help minimize heat transfer, keeping your home cooler in the summer and warmer in the winter.

Benefits of Energy-Efficient Windows:Lower utility bills: Reduce heating and cooling costs year-round. – Environmentally friendly: Decrease energy consumption to reduce your carbon footprint. – Consistent temperature control: Eliminate drafts and hot or cold spots in various rooms.

Feature Traditional Windows Modern Energy-Efficient Windows
Insulation Minimal High-performance insulated glass
UV Protection Limited Built-in Low-E coatings
Energy Consumption Impact Higher Reduced

2. Enhanced Curb Appeal

Modern windows come in various styles, materials, and finishes, allowing you to tailor their design to complement the overall aesthetic of your home. Whether you prefer sleek aluminum frames or traditional wood finishes, updated windows can transform the look of any property.

Design Options to Consider:Frame Materials: Vinyl, fiberglass, aluminum, or wood. – Window Styles: Casement, double-hung, bay/bow, sliding. – Customization Options: Color finishes, grille patterns.

A well-designed window upgrade enhances curb appeal while contributing to a higher resale value for homeowners looking to sell their property in the future.

3. Noise Reduction

Modern windows provide excellent soundproofing capabilities due to their advanced construction. Laminated glass panes and insulated frames block outside noise effectively—ideal for those living near busy streets or noisy neighborhoods.

How Soundproofing Works: – Dual-pane or triple-pane configurations create additional barriers for sound waves. – Acoustic glass reduces vibrations caused by noise pollution.

By upgrading to modern windows, you can enjoy a quieter and more peaceful indoor environment without external disruptions.

4. Increased Natural Light Without Sacrificing Comfort

With larger glass surfaces and advanced coatings that filter harmful UV rays without blocking natural sunlight, modern windows brighten up interiors while protecting furniture from fading over time.

Advantages of Maximized Natural Light: – Reduces dependency on artificial lighting during the day. – Creates an inviting atmosphere within living spaces. – Helps boost mood and productivity by allowing sunlight indoors safely.

5. Improved Home Security

Modern window systems integrate advanced security features such as multi-point locking mechanisms and impact-resistant glass for enhanced protection against break-ins.

Key Safety Features: – Tempered glass that’s less likely to shatter upon impact. – Laminated security glass for additional strength. – Reinforced locking mechanisms for added deterrence against intruders.

Enhanced security not only protects loved ones but also provides peace of mind when away from home.

By upgrading your home with modern window installations tailored to meet today’s standards in efficiency and design innovation, you can enjoy these benefits while making a smart investment in both comfort and long-term value for your property.

Preparing Your Home for a Smooth and Efficient Window Replacement Rockville, MD Process

Proper preparation is key to ensuring that your window installation project is smooth, efficient, and stress-free. A well-prepared home not only makes the installation process easier for professionals but also minimizes potential disruptions to your daily life. Follow these steps to get your home ready for a successful window installation.

Clear the Work Area

  • Move Furniture: Relocate sofas, chairs, tables, or other large pieces of furniture at least a few feet away from the windows.
  • Take Down Window Coverings: Remove curtains, blinds, drapes, or shades before installation day.
  • Remove Wall Decorations: Take down any artwork or decorations hanging on walls near the windows.

Protect Your Floors and Belongings

  • Use drop cloths or tarps to cover floors near work areas.
  • Remove fragile items like vases, picture frames, or knick-knacks from nearby spaces.
  • If possible, relocate electronics such as TVs or speakers away from the installation site.

Ensure Easy Access for Installers

  1. Unlock gates or doors leading to areas where they’ll need access.
  2. Clear any outdoor furniture, grills, plants, or tools blocking exterior windows.
  3. Trim overgrown shrubs or branches near window openings.

Communicate with Your Installation Team

  • The timeline for the project so you can plan accordingly.
  • Any special instructions they may have regarding preparation steps specific to your type of window installation.
  • Parking arrangements if installers need space for equipment trucks.

Secure Pets and Children

  • Keep pets in a separate room during the entire process to avoid accidents or distractions.
  • If possible, arrange childcare during peak working hours on installation day.

Anticipate Noise and Dust Levels

  1. Scheduling tasks that require quiet (e.g., remote work calls) during non-installation hours.
  2. Planning light cleaning afterward to remove dust particles left behind.

Post-Installation Cleanup Steps

Task Action
Inspect New Windows Check for proper sealing and functionality before accepting completion.
Remove Tarps Carefully lift protective materials used during preparation stages.
Restore Furniture Move furniture back into place around new windows.

Preparing thoroughly allows both you and the professionals handling replacements ample opportunity toward success without avoidable hiccups mid-process through minor foresight adjustments beforehand accordingly

istockphoto-1369399520-612×612

How to Properly Prepare Your Home for a Smooth and Efficient Window Installation Process

Proper preparation is key to ensuring your window installation process goes as smoothly as possible. Taking the time to organize your space and make accommodations before the professionals arrive will save time, reduce stress, and help installers work efficiently. Below are steps and tips to get your home ready for a seamless window installation experience.

1. Clear the Work Area

Window installation often involves removing the old windows, handling large materials, and working with tools. To make it easier for workers to maneuver:
Move Furniture: Relocate furniture near windows being replaced to create ample space for workers and their equipment.
Take Down Window Treatments: Remove curtains, blinds, shutters, or other treatments from the windows in advance. – Clear Pathways: Ensure all walkways leading to the installation site are free from clutter or obstacles like rugs or decor pieces.

2. Protect Your Belongings

Window installation can sometimes create dust or debris. To keep your items clean and safe:
Cover Furniture: Use drop cloths or plastic sheeting to protect nearby furniture from dirt or damage. – Remove Wall Decorations: Take down photos, mirrors, or artwork close to window areas in case vibration during the process causes them to fall. – Use Floor Protection: Consider laying down protective materials like cardboard or drop cloths along high-traffic areas where workers will walk.

3. Ensure Access Inside and Outside

Installers need clear access not only inside but also outside your home near windows being replaced. Here’s how you can assist:
– Trim any nearby bushes, trees, or landscaping that may block access to exterior windows. – Make sure outdoor furniture, planters, or decorations are moved away from exterior walls. – Unlock all gates or doors leading to access points so installers can move freely between indoor and outdoor spaces.

4. Secure Pets and Children

The tools and equipment used during window installation can pose risks to pets or small children if they’re left unattended around the work area. You can ensure safety by: – Keeping pets in a secure room away from noise during the process. – Explaining safety rules for children about staying clear of tools or construction zones.

5. Communicate With Your Installers

Effective communication with your window installation team ensures everyone is on the same page regarding expectations: – Inform installers of any specific concerns about your home (e.g., fragile floors, special instructions for accessing certain rooms). – Confirm arrival times so you’re prepared when they arrive. – Ask questions ahead of time about what aspects of preparation may already be covered by their team.

Sample Checklist for Home Preparation

Preparation Step Completed (Yes/No) Notes
Move furniture near windows
Take down curtains/blinds
Cover indoor/outdoor belongings
Trim landscaping near windows
Secure pets/children

By using this checklist, you’ll stay organized while preparing your home effectively.

Taking these steps ensures that both you and your installer are set up for success during window replacement day. Organizing in advance minimizes disruptions while allowing professionals to complete their work more efficiently without unexpected delays.


Step-by-Step Guide to Window Replacement Rockville, MD Process

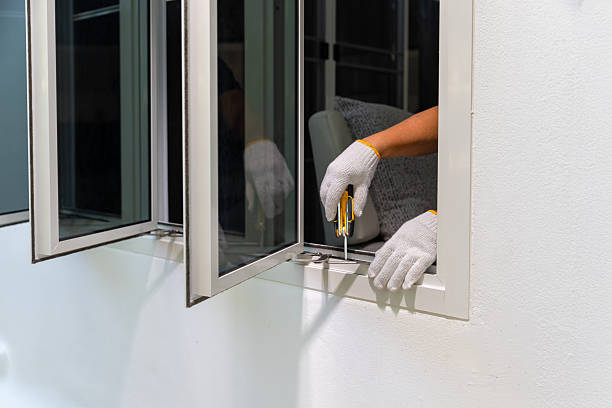
Worker replace aluminium sliding window lock.

Replacing windows in your home can seem like a complex task, but breaking it into manageable steps ensures a smoother process. Here’s a step-by-step guide to help you navigate the complete window replacement journey, from preparation to completion.

1. Assess Your Current Windows and Needs

Before beginning any window replacement project, it’s essential to evaluate your current situation. Ask yourself: – Are your current windows damaged, outdated, or inefficient? – Are you looking for better energy efficiency or updated aesthetics? – What type of windows do you want to install (double-hung, casement, sliding, etc.)?

This initial assessment will help you determine whether full-frame replacement or pocket installation is appropriate for your project.

2. Gather Necessary Tools and Materials

Having the right tools and materials ready before starting can save time and reduce stress. Common items needed include: – Measuring tape – Level – Pry bar – Utility knife – Caulk and caulking gun – Insulation foam – Safety glasses and gloves

Additionally, ensure the new windows are delivered on time and match your specifications.

3. Take Accurate Measurements

Accurate measurements are crucial for ensuring the new windows fit correctly. Measure the height and width of the window opening at multiple points (top, middle, bottom). Note any discrepancies as older homes may have uneven openings.

Measurement Type Measurement 1 Measurement 2 Measurement 3 Final Size
Width xx inches xx inches xx inches Smallest
Height xx inches xx inches xx inches Smallest

Always use the smallest measurement when ordering new windows to account for variations.

4. Remove Old Windows Safely

Removing existing windows requires careful attention to avoid damaging surrounding structures or materials: 1. Use a utility knife to cut through any caulk or paint sealing the old window in place. 2. Remove interior stops and sashes with a pry bar. 3. Unscrew or release any fasteners holding the window frame. 4. Gently pull out the old frame while wearing safety gear.

Inspect for any damage around the opening that may need repair before proceeding.

5. Install New Windows

Installing replacement windows involves several steps: 1. Dry-fit: Place the new window into the opening to ensure proper fit. 2. Apply Caulk: Run a bead of exterior-grade caulk around the perimeter of the opening where contact will be made. 3. Secure Frame: Insert the window into place and use shims as needed to level it properly before securing it with screws. 4. Test Operation: Open and close the window multiple times to confirm smooth operation.

Take care not to over-tighten screws as this could warp your new frame.

6. Insulate And Seal Gaps

To maximize energy efficiency: – Use low-expansion spray foam insulation between gaps in frames. – Trim excess foam after it cures.

Finish by applying an additional layer of caulk around exterior edges where frames meet siding for weatherproofing purposes.

7. Add Interior Finishing Touches

Reinstall interior stops or trim removed during step four or replace them if needed with updated molding styles matching room decor preferences.

By following each outlined phase carefully above ensures longevity while boosting comfort/security within household spaces without unnecessary surprises/errors occurring during installation efforts

Expert Window Installation Rockville, MD: Accurate Measurements Matter

Accurate measurements are the cornerstone of any successful window replacement project. Incorrect dimensions can lead to ill-fitting windows, inefficient sealing, and even structural damage. Taking precise measurements ensures that your new windows not only look great but also perform effectively in terms of insulation, security, and energy efficiency.

Tools You’ll Need

To begin measuring your windows accurately, gather the following tools: – Measuring tape: A sturdy, retractable tape measure with clear markings. – Level: Ensures the window frames are straight and aligned properly. – Notebook or digital device: To record all measurements for future reference. – Pencil or marker: For marking areas if necessary.

How to Measure for Window Replacement

  1. Take three horizontal measurements inside the existing window frame:
    a) At the top
    b) In the middle
    c) At the bottom
  2. Use the smallest measurement as your final width dimension to account for any irregularities in the frame.

  3. Similarly, take three vertical measurements from inside of the frame:
    a) Left side
    b) Center
    c) Right side
  4. Again, use the smallest value as your height dimension.

  5. Measure from inside edge to outside edge of the frame; this ensures that any replacement window fits comfortably within your wall’s depth.

Common Measurement Mistakes to Avoid

To ensure accuracy, avoid these common errors: – Measuring windows from outside instead of inside. – Neglecting to subtract space for frame material when needed. – Using a worn-out or inaccurate tape measure. – Failing to record all measurements clearly and consistently.

Measurement Tips for Specialty Windows

If you’re replacing specialty windows like bay or arched designs, additional steps may be required: – Break down curved sections into segments and measure each individually. – Consult with a professional if measuring unusually shaped frames seems challenging.

Measurement Aspect Key Considerations
Width Always use interior dimensions; record smallest value
Height Include sill angles if necessary
Frame Depth Double-check compatibility with walls or trim

Accurate measurement is an essential first step that impacts everything else in your project—from ordering materials to ensuring proper installation. Taking time here saves time and money later while guaranteeing long-term performance.

Accurate Measurements: The Key to Successful Replacement Windows Rockville, MD

Accurate measurements are the foundation of any successful window replacement project. Without precise dimensions, even the highest-quality windows may fail to fit properly, leading to issues such as drafts, energy inefficiency, water leakage, and compromised aesthetics. Below is a detailed guide on how to take accurate measurements for window replacement.

Essential Tools for Window Repair in Rockville, MD

  • Measuring tape (preferably a steel one for accuracy)
  • Notebook or digital device for recording measurements
  • Level (optional but helpful)
  • Step ladder (if needed for higher windows)

Having the right tools ensures precise results and minimizes errors.

How to Measure for Window Glass Replacement Rockville, MD

  1. Take three horizontal measurements (top, middle, and bottom) of the window frame from jamb to jamb.
  2. Record the smallest measurement. Use this as your final width dimension.

  3. Measure vertically from the sill (bottom of the frame) to the top of the opening at three points: left side, center, and right side.
  4. Again, record the smallest measurement as this will ensure a proper fit.

  5. If you’re replacing with a retrofit or new-construction window model, measure the depth of your existing frame or wall recess.
  6. Standard measurement requirements vary, so consult manufacturer guidelines if needed.

  7. Check whether your window opening is square by measuring diagonally from corner to corner in an “X” pattern.
  8. If there’s more than 1/4-inch difference between diagonal measurements, adjust your plans or consult a professional installer.

  9. Identify any potential obstructions such as molding or trim that might affect installation.
  10. Factor in these details when planning your purchase and installation process.

Common Measurement Challenges

Challenge Solution
Out-of-square frames Consider custom-sized windows or adjustments during installation
Hard-to-access areas Use an extendable ladder or hire a professional for hard-to-reach spaces
Old building structures Account for irregularities common in older homes

Why Precision Matters

  • Higher installation costs due to resizing
  • Delays caused by reordering incorrect sizes
  • Reduced energy efficiency from gaps or improper sealing
  • Compromised structural integrity of surrounding walls

Taking precise dimensions saves time and money while delivering optimal results in terms of aesthetics and functionality.

When to Seek Professional Help

If you’re unsure about taking accurate measurements yourself—especially for custom windows or uniquely shaped openings—it’s wise to consult with a professional contractor or installer. Many companies offer measurement services as part of their package.

Accurate measurements are truly integral for achieving dependable performance from your replacement windows while maintaining comfort and style in your home environment.

Choosing and Ordering the Right Windows for Your Home

Selecting and ordering the perfect windows for your home is a critical step in ensuring both functionality and aesthetics. The process involves balancing personal preferences, energy efficiency, durability, and budget. Here’s a detailed guide to help you make the best decision.

Factors to Consider When Choosing Windows

  • Style of Windows: Different window styles serve different purposes. Common options include:
  • Double-Hung: Versatile and easy to clean with two operable sashes.
  • Casement: Hinged on one side, opening outward for better ventilation.
  • Sliding: Horizontal movement, ideal for wide spaces.
  • Picture Windows: Fixed glass panels that provide unobstructed views.

  • Vinyl: Affordable, low-maintenance, and energy-efficient.
  • Wood: Highly customizable but requires regular upkeep.
  • Fiberglass: Durable with excellent thermal performance but often pricier.
  • Aluminum: Lightweight and strong but less insulated than other materials.

  • Choose between single-pane, double-pane, or triple-pane depending on insulation needs.
  • Consider Low-E (low emissivity) coatings for better energy efficiency by reflecting heat.

  • Energy Performance Ratings: Look at labels such as U-Factor (measures heat loss) and Solar Heat Gain Coefficient (SHGC). Lower values are ideal for colder climates.

Understanding Your Budget

Windows are available at varying price points. To stay within budget while ensuring quality: – Set a realistic spending range based on the size of your project. – Account for additional costs like delivery charges or customizations. – Prioritize features that are non-negotiable, such as insulation or material quality.

Window Material Average Cost per Unit (Installed)
Vinyl $300–$700
Wood $800–$1,200
Fiberglass $600–$1,500
Aluminum $400–$900

Steps to Order the Right Windows

  1. Measure Accurately: Take precise measurements of window openings (height, width) using a measuring tape. Always record dimensions in inches.

  2. Research Trusted Manufacturers or Brands: Review customer feedback and warranty policies before committing to a brand.

  3. Consult Professionals for Customizations: If you need specialized designs like arched frames or stained glass options, work with experts who can accommodate these requirements.

  4. Place Your Order Early: Many custom windows have lead times ranging from weeks to months due to manufacturing schedules. Plan ahead so installation timelines aren’t delayed.

  5. Verify Details Upon Delivery: Check that all items match your specifications before installation begins—this includes frame material color and dimensions.

Tips for Eco-Friendly Choices

  • Opt for ENERGY STAR-certified products designed to meet energy-saving standards tailored by region.
  • Choose materials from recyclable sources where possible (e.g., wood from sustainably managed forests).
  • Install tinted or double-glazed panes in sun-exposed areas to reduce cooling costs during warmer months.

By selecting the right windows tailored specifically to your home’s design and functional needs—and ordering them through trusted suppliers—you’ll ensure a smooth installation process that adds value both immediately and in years ahead.

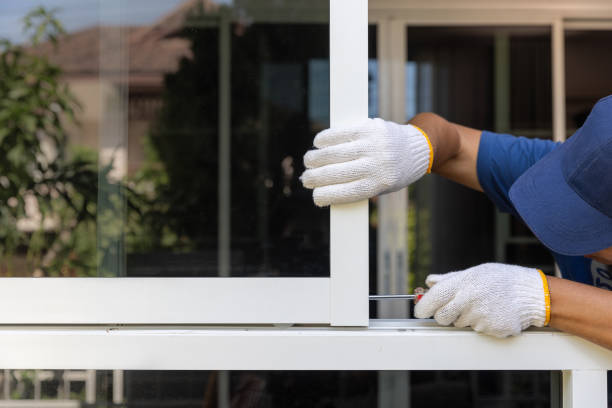
The glazier is about to install an aluminum-glass window.

Tips for Preparing Your Home in Rockville, MD for Seamless Windows Installation

Proper preparation of your home and work area is essential to ensure that your window installation project goes smoothly, safely, and efficiently. Taking the time to prepare can also help protect your belongings and reduce post-installation cleanup. Below is a detailed guide on how to prepare for a seamless window installation.

Clear the Installation Area

Before the installation begins, make sure that all areas around the windows are free of obstructions. This allows the installers to have safe and easy access to the work area. Here are some tips:
Remove Furniture: Move large furniture pieces like couches or tables away from windows.
Take Down Window Treatments: Remove blinds, curtains, rods, or any other decorative elements hanging around the window frame.
Clear Outdoor Areas: If external access is required, remove outdoor furniture, planters, or debris near windows.

Protect Your Belongings

Window installation can generate dust and debris. Protecting your possessions ensures they remain clean and undamaged during the process: – Cover furniture with drop cloths or plastic sheets. – Remove fragile items such as picture frames, vases, or electronics that could be affected by vibrations during installation. – Roll up rugs in rooms where work is taking place to avoid damage from debris.

Ensure Safety Measures Are in Place

Preparation also involves creating a safe environment for both installers and household members: – Keep pets away from construction areas by confining them in another room. – Discuss safety protocols with family members so they know which areas to avoid during installation.

Provide Access for Installers

For an efficient workflow, ensure that installers have everything they need before starting: 1. Unlock all windows being replaced so they can be easily removed.
2. Provide clear pathways indoors and outdoors if installers need access to different parts of your property (e.g., driveways or gates).

Table: Checklist for Preparing Windows

Task Status
Remove window coverings
Move nearby furniture
Cover exposed surfaces Pending
Secure pets

Plan for Noise and Disruption

Window installation can be noisy due to tools like hammers or drills. Prepare yourself and others in your household by considering these steps: – Plan activities outside of the home if prolonged noise will be disruptive. – Let neighbors know about potential noise disturbances ahead of time.

Organize Tools & Materials (If DIY)

If you’re tackling window replacement as a DIY project, organize tools such as pry bars, caulk guns, measuring tape, and safety gear beforehand. Place materials like new windows close to their corresponding openings for easier handling during installation.

By following these steps when preparing your home and workspace, you can create an environment that facilitates a smooth window replacement process while reducing stress for everyone involved.

Sealing, Insulation, and Final Touches for a Perfect Window Installation

Ensuring your window installation is complete and durable goes beyond simply placing the window into the frame. The final steps—sealing, insulation, and finishing—are crucial for long-term functionality, energy efficiency, and aesthetic appeal. Here’s a detailed breakdown of how to approach these critical steps for optimal results.

Importance of Proper Sealing

  • Choose the Right Sealant: Opt for high-quality caulk or sealant designed specifically for your window frame’s material (e.g., vinyl, wood, aluminum). Silicone-based sealants often work best as they are flexible and long-lasting.
  • Apply Evenly: Use a caulking gun to apply an even bead of sealant along the edges where the window meets the frame and wall. Smooth it out with a gloved finger or caulk-smoothing tool for a clean finish.
  • Focus on Vulnerable Areas: Pay special attention to corners and gaps where leaks are most likely to occur.

Insulating Around Windows

Proper insulation improves energy efficiency by reducing heat transfer through gaps around the window. This step is particularly important in colder climates where heat loss can be significant during winter months.

  1. Once the window is installed but before sealing, inspect any gaps between the frame and wall.
  2. Larger gaps may require additional support materials before insulation.

  3. Low-expanding spray foam is ideal for filling small gaps without overloading or warping the frame.
  4. Apply carefully around the edges of the window to ensure consistent coverage.

  5. Over-expansion might exert pressure on your window frame or glass panes.
  6. Wipe away excess foam before it hardens using a damp cloth.

  7. If you’re installing new insulation materials behind trim work or near windowsills, ensure they meet recommended R-value ratings for climate control efficiency.

Finishing Touches to Enhance Appearance

  • Reattach interior molding or casing carefully.
  • Ensure miters (angled cuts) align perfectly at corners for a polished look.

  • If wooden frames were installed or modified during installation, sand rough edges lightly before applying paint or stain that matches existing décor.

  • Remove labels from glass panes.
  • Wash all surfaces with a non-abrasive cleaner to remove dust and smudges left during installation.

Table: Comparing Common Sealants

Type of Sealant Key Features Best Used For
Silicone-Based Flexible, waterproof, long-lasting High-moisture areas
Acrylic Latex Paintable; less flexible Interior applications
Polyurethane Strong adhesion; durable Exterior sealing in extreme weather conditions

By prioritizing sealing, insulation, and proper finishing touches during your window installation process, you can maximize energy efficiency while ensuring durability over time.


Signs You Need Replacement Windows Rockville, MD

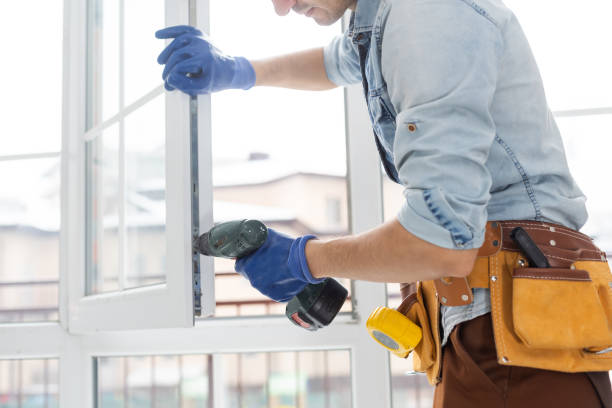
Handyman replace casement window stay friction.

Windows play a crucial role in your home’s overall functionality, comfort, and appearance. Over time, however, they can begin to show signs of wear and tear. Knowing when to replace your windows is essential for maintaining energy efficiency, security, and aesthetic appeal.

Drafts or Air Leaks?

If you feel a noticeable draft near your windows or detect temperature fluctuations in certain rooms, it’s likely that the seals around the windows have weakened.

How to test for drafts:– Check for peeling or cracked caulking around the frame.

Windows with poor insulation or aging materials allow heat transfer between indoor and outdoor spaces. If you notice a consistent rise in heating or cooling costs, inefficient windows may be contributing to energy loss.

Double- or triple-pane windows often utilize inert gases like argon between panes for insulation. If condensation forms inside the glass layers, this indicates that the seal has failed and is no longer effective.

Why this matters:
– Compromised seals reduce thermal performance. – Moisture trapped inside leads to foggy glass and reduced visibility.

Stiff or sticking windows are more than just an annoyance—they could signal warped frames due to moisture exposure or years of wear.

Common causes:
– Warped wooden frames caused by humidity. – Rusted hardware on older metal-framed windows. – Accumulated dirt obstructing movement mechanisms.

Wooden window frames are particularly susceptible to rot if they’re exposed to water over time. Signs like peeling paint, soft spots when pressed, and discoloration suggest it’s time for replacement.

Indicator Possible Cause What To Do
Peeling Paint Excess Moisture Inspect surrounding area; consider new materials like vinyl/aluminum
Soft Wood Frames Wood Rot Replace damaged frames entirely before it spreads further

Modern double-pane windows offer better soundproofing than older single-pane models. If outdoor noise easily penetrates into your living space, upgrading your windows can help create a quieter environment indoors.

UV rays from sunlight passing through outdated glass can fade carpets, furniture, and hardwood floors over time. Replacing old windows with ones featuring Low-E glass coatings helps block harmful UV rays while letting natural light in.

Benefits of Low-E Glass:– Protects interior décor from fading. – Improves thermal insulation properties year-round.

Your home’s exterior aesthetic largely depends on its architectural features—including its windows! Outdated window designs can make even a well-maintained house appear aged or less appealing compared to modern alternatives offering cleaner lines and improved finishes.

Cracked panes not only compromise safety but also impact weather resistance and insulation capacity significantly over time if left unaddressed—becoming costly long-term risks rather than manageable repairs upfront where possible instead

Replace Entire Window?

10 Signs You Need Window Repair Rockville, MD Homeowners Shouldn’t Ignore

Updating the windows in your home is an investment that impacts aesthetics, energy efficiency, and overall comfort. Identifying when it’s time to replace your windows can save you money in the long run while improving the quality of your living environment. Below are ten key signs that indicate it may be time to upgrade.

Feeling a breeze near closed windows is a clear indicator of air leaks, which can lead to higher heating and cooling costs.

Windows should operate smoothly without sticking or requiring excessive force. Over time, warping due to moisture or failing hardware can make opening and closing them difficult, compromising functionality and safety.

Outdated windows often lack proper insulation, causing your HVAC system to work harder to maintain indoor temperatures.

If you notice fogging, condensation, or frost buildup between double-pane window glass, this typically indicates a failed seal. When seals fail, insulating gases escape, reducing energy efficiency and visibility.

Do you hear every car horn or conversation happening outside? Older windows may lack soundproofing capabilities that newer models offer with enhanced materials and double- or triple-pane designs.

Cracked glass, peeling paint on wooden frames, rotting sashes, and water damage are all visual clues that point toward aging windows in need of replacement.

Type of Visible Damage Cause Impact
Cracks in Glass Physical impact Reduced safety & insulation
Rotting Frames Moisture exposure Structural instability
Warping Weather changes Poor operation & sealing

Older window designs may not complement modern architectural trends or enhance your home’s curb appeal. Upgrading your windows offers an opportunity to select styles that better suit contemporary tastes while increasing property value.

Windows play a key role in allowing natural light into interior spaces. If old frames obstruct light flow due to their design or placement limitations, replacing them with larger panes can brighten rooms effectively.

Outdated locking mechanisms on older windows might not provide adequate protection against forced entry attempts compared to modern options designed with advanced security features like multi-point locks.

Are you constantly repainting wooden frames or struggling with broken parts? High-maintenance windows could cost more over time compared to low-maintenance vinyl or composite alternatives available today.

Upgrading your home with modern window systems can address these issues while delivering long-term benefits such as improved comfort levels and boosted property value—making it a worthwhile investment for any homeowner concerned about performance and aesthetics alike.

How Often Should You Replace Your Home’s Windows in Rockville, MD for Maximum Efficiency

Windows play a critical role in the overall efficiency, comfort, and appearance of your home. While high-quality windows can last for decades, they don’t last forever. Several factors determine how often you should replace your home’s windows to maximize energy efficiency and maintain functionality.

Factors Affecting Window Longevity

  • Wood: Typically lasts 15–20 years but requires frequent maintenance to prevent rot and warping.
  • Vinyl: Can last 20–40 years with minimal upkeep due to its resistance to moisture and weather damage.
  • Aluminum: Durable but prone to thermal inefficiency; lifespan is usually around 20–25 years.
  • Fiberglass: Extremely durable and resistant to weathering; it can last up to 50 years or more.

  • Climate Conditions: Homes in areas with extreme weather (e. g. , heavy rain, snow, or intense heat) may experience faster wear and tear on windows compared to homes in milder climates.

  • Installation Quality: Poorly installed windows are more prone to leaks, drafts, and other issues that shorten their lifespan.

Signs It’s Time for Replacement

  1. Drafts Around Windows
    Feeling cold air seeping through during winter? Drafts indicate poor insulation or aging seals.

  2. Difficulty Opening or Closing Windows
    Warped frames or damaged hardware might make operation difficult or unsafe.

  3. Condensation Between Panes
    If moisture is trapped inside double- or triple-pane windows, the insulating gas has likely failed.

  4. Visible Cracks or Damage
    Chipped glass panes or deteriorating window frames could compromise both efficiency and safety.

  5. High Energy Bills
    Old windows without energy-efficient features may lead to significant heat loss in winter and increased A/C use in summer.

  6. Fading Interior Materials
    UV rays passing through outdated glass can cause carpets, furniture fabrics, and artwork to fade over time.

  7. Excessive Noise From Outside
    Modern insulated glass units (IGUs) provide better soundproofing compared to older single-pane designs.

Best Practices for Replacing Windows

  • Consider professional installation services from certified contractors.
  • Use durable materials suited for your region’s climate.
  • Schedule routine inspections every few years after installation for proactive maintenance.
Window Material Average Lifespan Maintenance Level Cost Range (Per Window)
Wood 15–20 years High $200–$800+
Vinyl 20–40 years Low $150–$600+
Aluminum 20–25 years Moderate $200–$800+
Fiberglass Up to 50 years Low $300–$1,000+

Replacing your home’s windows at the right time improves energy savings while enhancing comfort and aesthetics—making it an investment worth considering carefully based on your home’s specific needs.

Recognizing Visible Damage and Functional Issues in Older Windows

Windows are a vital component of any home, providing natural light, insulation, and security. Over time, however, their performance can deteriorate due to wear and tear or exposure to the elements. Recognizing the visible damage and functional issues in older windows is essential for maintaining your home’s energy efficiency, safety, and overall comfort. Below are some key indicators that it might be time to address your aging windows.

Identifying Visible Damage

Visible signs of damage often indicate that your windows have reached the end of their lifespan.

  • Cracked or Broken Glass: Damaged glass reduces energy efficiency and can compromise security.
  • Warped or Rotted Frames: Wooden frames are particularly susceptible to rot caused by moisture. Warping can also distort the shape of the frame, leading to poor sealing.
  • Peeling Paint: Deteriorating paint on window frames may signal water damage or neglect.
  • Fogging Between Panes(in double or triple-pane windows): This occurs when seals fail, allowing moisture to seep between the glass layers.
  • Gaps or Drafts Around Frames: Small gaps around your window frames indicate improper sealing and can lead to unwanted drafts.

Functional Issues to Watch For

In addition to physical damage, older windows often develop functionality problems that impact their usability.

  • Difficulty in Opening or Closing: If your windows stick or require excessive effort to open/close, it could signal warping or hardware failure.
  • Drafts Indoors: Feeling cold air near closed windows indicates poor insulation or seal failure.
  • Condensation on Glass Surfaces: While occasional condensation is normal under certain conditions, persistent interior condensation may suggest inadequate ventilation or poor thermal regulation.
  • Excessive Noise Penetration from Outside: Aging windows with minimal soundproofing can allow more external noise into your home.

Risks Associated with Ignoring Window Damage

Risk Potential Outcome
Increased Energy Bills Poor insulation leads to higher heating/cooling costs.
Structural Damage Water infiltration from broken seals causes further rot.
Reduced Home Security Cracked glass and failing locks invite intrusions.
Decrease in Comfort Drafts create uneven temperatures indoors.

Steps for Addressing Old Windows

  1. Conduct a Thorough Inspection:Check all windows for visible signs of wear as well as operational difficulties.
  2. Consult a Professional:Window specialists can assess whether repair is possible or if replacement is necessary.
  3. Consider Replacement Options:Modern energy-efficient designs offer better thermal performance while enhancing curb appeal.

Boost Your Home’s Value with Window Replacement Rockville, MD

Upgrading your home’s windows does more than just improve functionality; it can significantly enhance curb appeal and increase the overall value of your property. Modern window designs not only provide aesthetic benefits but also cater to energy efficiency and durability. Here’s how replacing your windows can transform your home’s appearance and market value.

The Aesthetic Impact of New Windows

Outdated, damaged, or mismatched windows can immediately detract from a property’s visual appeal. Installing modern designs lets you fine-tune the style of your home, giving it a contemporary, classic, or custom look that aligns with your taste.

  • Customization Options: Choose from various materials such as wood, vinyl, aluminum, or fiberglass.
  • Frame Design: Opt for clean lines or decorative details to match architectural styles.
  • Color Choices: Coordinate frames with exterior paint schemes for a cohesive appearance.
  • Enhanced Glass Features: Add decorative glass panels or grilles for extra character.

Boosting Property Value Through Window Replacement

According to industry reports, homeowners typically recoup a significant percentage of their window replacement costs upon selling their homes.

  1. Improved Energy Efficiency
    Energy-efficient windows reduce heating and cooling costs by providing better insulation. This feature is increasingly sought after by eco-conscious buyers who value homes with lower utility bills.

  2. Modern Appeal
    New windows create a polished and updated look that appeals to potential buyers seeking move-in-ready properties.

  3. Reduced Maintenance Costs
    Durable materials such as vinyl and fiberglass are easier to maintain than older wooden frames prone to rot or wear over time.

Window Type Approximate ROI (%)
Vinyl Replacement 67-75
Wood Replacement 68-77

Choosing the Right Windows for Maximum Impact

Not all windows are created equal when it comes to adding curb appeal or increasing property value.

  • Match window style with architectural design (e. g. , double-hung for traditional homes or casement for modern designs).
  • Work with professional installers to ensure proper fitting and seamless integration into existing structures.

By carefully selecting high-quality replacements that complement your home’s design while meeting functional needs, you can effectively maximize both its aesthetic charm and resale potential.

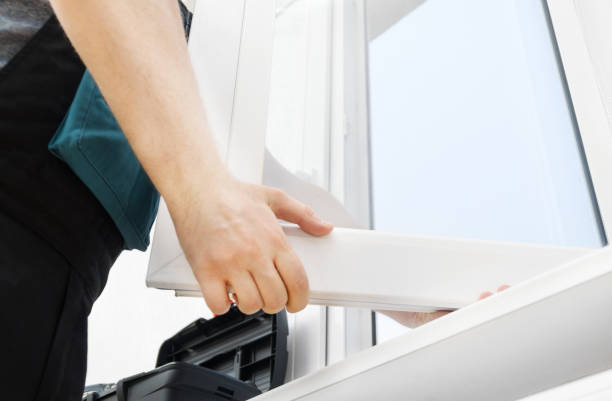
Professional handyman installing window at home.

Enhance Your Home with Professional Window Installation Rockville, MD

Modern window installation offers homeowners more than just an aesthetic upgrade. Among the key benefits, enhancing natural light and improving airflow rank high. These features not only contribute to a healthier living space but also significantly impact energy efficiency and overall comfort. Here’s a detailed look at how modern windows can transform your home in terms of lighting and ventilation.

Maximizing Natural Light

  • Modern designs often feature slimmer frames, maximizing the surface area of the glass pane. This allows more light to filter through compared to older, bulkier window styles.

  • This ensures that your home stays well-lit without becoming uncomfortably warm.

  • During installation or renovation projects, experts can recommend ideal window placements for optimal natural light based on your home’s orientation and layout.

Benefits of Increased Natural Light:

  • Reduces dependence on artificial lighting during daytime.
  • Improves mood and productivity by creating a cheerful ambiance.
  • Enhances the aesthetic appeal of interiors by highlighting architectural features and decor.

Enhancing Airflow with Functional Design

Ventilation is another critical aspect of modern window installation. Proper airflow not only improves air quality but also helps regulate indoor temperatures efficiently.

  • These windows offer dual operability—both sashes can move up or down independently. This allows warm air to escape through the top while cool air flows in from below.

  • Hinged at the side, casement windows swing open completely, maximizing airflow when needed.

  • These glide horizontally along a track, making them easy to operate while allowing for substantial ventilation in tight spaces.

Ventilation Tips:

  1. Opt for operable windows in rooms prone to moisture or odors (e. g. , kitchen or bathroom).
  2. Consider cross-ventilation by installing windows on opposite walls or adjacent corners.
  3. Use screens on exterior-facing windows for fresh air circulation without letting insects in.

Comparing Traditional vs Modern Windows: Key Features

Feature Traditional Windows Modern Windows
Frame Design Thicker frames; less glass area Slimmer frames; maximized glass area
Energy Efficiency Basic single-pane glass Double/triple-pane; Low-E coatings
Ventilation Options Limited functionality Variety of operable designs
Aesthetic Appeal Standard styles Customizable sizes & sleek finishes

By upgrading to modern window installations, you can achieve better control over lighting and airflow while enjoying enhanced energy efficiency and style. Thoughtful selection of window types ensures a harmonious balance between functionality and aesthetics, ultimately improving your home’s livability both inside and out.

The Benefits of Energy-Efficient Windows for Reducing Costs and Enhancing Comfort

Energy-efficient windows have revolutionized the way homeowners approach comfort, energy savings, and environmental responsibility. Investing in these modern solutions offers a range of advantages that go beyond aesthetics.

Reduced Energy Costs

  • Improved Insulation:Double or triple-pane glass with inert gas (like argon or krypton) between the panes reduces heat transfer.
  • Low-E Coatings:Low-emissivity coatings reflect heat back into your home during winter and keep it out during summer.
  • Sealed Frames:Energy-efficient window frames are tightly sealed to prevent drafts and air leaks.

These features ensure less reliance on heating and cooling systems, which directly translates into lower energy bills over time.

Enhanced Comfort Levels

Beyond saving money, energy-efficient windows improve overall household comfort.

  • Fewer cold drafts or hot spots near windows.
  • Stable room temperatures throughout the day.
  • Reduced condensation buildup on glass surfaces.

By minimizing temperature fluctuations, these modern installations create a more pleasant living environment year-round.

Environmental Benefits

Energy efficiency isn’t just about saving money—it also supports sustainability by reducing carbon footprints.

Feature Environmental Impact
Reduced Energy Demand Less reliance on heating/cooling systems decreases greenhouse gas emissions
Sustainable Materials Many manufacturers use eco-friendly materials like recycled aluminum or wood
Longevity Durable designs mean fewer replacements, reducing waste in landfills

By choosing energy-efficient options, you’re contributing to a greener planet while enjoying the personal benefits they provide.

Increased Home Value

Energy-efficient upgrades are highly attractive to potential buyers.

  1. Market Appeal: Modern buyers seek homes with sustainable features that promise long-term savings.
  2. Curb Appeal: With sleek designs and customizable options, newer window models enhance exterior aesthetics.
  3. Home Inspection Benefits: Newer installations often pass inspections easily due to their improved durability and compliance with modern codes.

Replacing outdated windows with energy-efficient alternatives can be a critical factor when selling your home at a competitive price point.

Noise Reduction

Another overlooked benefit of energy-efficient windows is their ability to reduce outdoor noise intrusion significantly.

  • Quieter indoor environments ideal for work-from-home setups or relaxation.
  • Better separation from traffic noise in urban areas.
  • Improved privacy through advanced soundproofing properties.

This feature adds tremendous value for those living in busy neighborhoods or near high-traffic zones.

Key Takeaways

Investing in energy-efficient windows brings long-lasting financial savings, improved home comfort, environmental advantages, increased property value, and noise reduction. By upgrading your old units with these innovative solutions today, you’ll enjoy both short-term satisfaction and long-term benefits that align with modern standards of living.